Getting started with ESP-IDF (Windows 10 & 11)
Program ESP32 devices using the ESP-IDF framework in Visual Studio Code or Eclipse
Get started with ESP-IDF, the official framework from Espressif to develop for ESP32 devices. While the Arduino IDE is easy to use, its limitations begin to show when project size and complexity begin to increase.
In this tutorial, you are going to learn how to set up Espressif ESP-IDF (ESP-Integrated Development Framework) for Windows. A Tutorial to set up the ESP-IDF in Linux will be made available at a later date.
You will be able to develop for any Espressif devices supported by the ESP-IDF irrespective of which specific module you might have.
Install ESP-IDF & Dependencies
Before the ESP-IDF extension can be installed some prerequisites have to be met. The easiest way to install the prerequisites on Windows 10 and 11 is to download and install the ESP-IDF Tools Installer which can be found here.
If data is not a priority then I recommend using the online installer, that way you will get the latest updates. If data cost is a consideration then it might be worth downloading the offline installer.
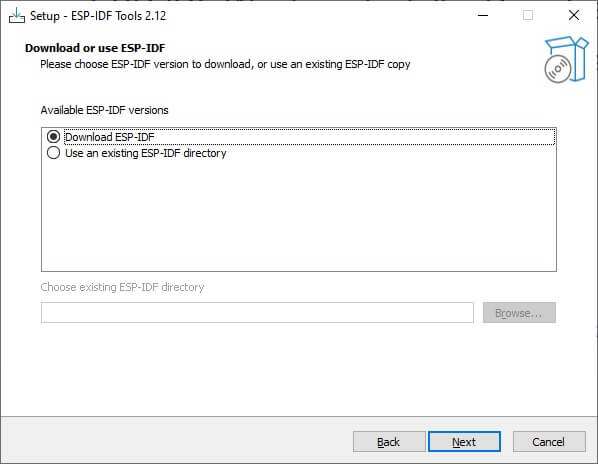
Run the installation. At a point during the installation, you will be prompted to download the ESP-IDF or to select an existing ESP-IDF directory. If you have not downloaded the ESP-IDF previously then select the Download ESP-IDF option.
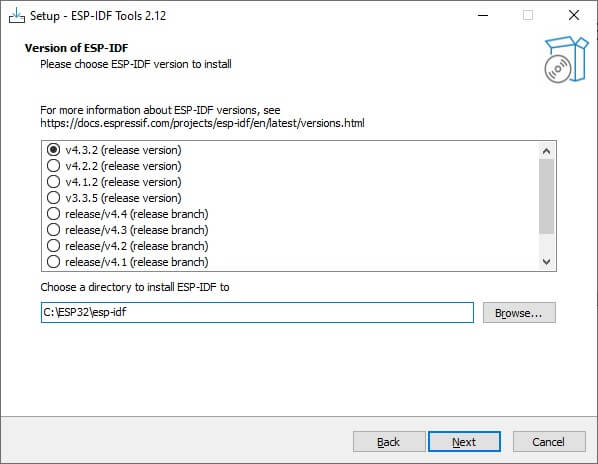
The next windows will ask you to choose the version of the ESP-IDF that you want to download. I recommend choosing V4 or higher.
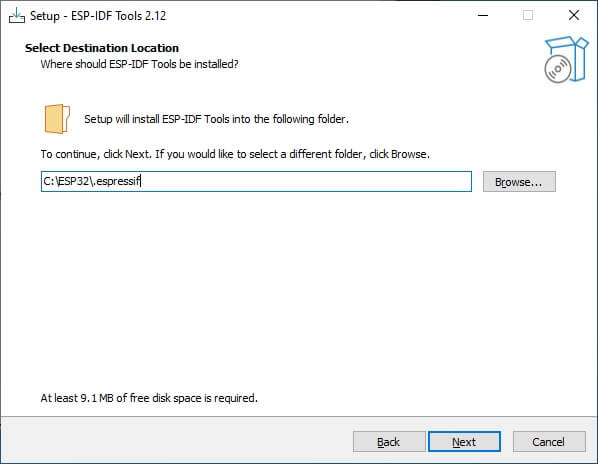
The important part here is to keep the path to the installation directory short and there must not be any white spaces. In this example, I am installing the ESP-IDF in an ESP32 folder that I created in the root of my C drive.
Click on next, leave the settings on default or select which components you want to install. The ESP-IDF will now begin to download and install, this will take a few minutes.
Click on finish without changing any of the selections. This will run some scripts on your system that will set up environment variables needed to use the ESP-IDF.
If everything went well then you now have all of the prerequisites installed to use the ESP-IDF.
If you want to use the ESP-IDF in VS Code then skip to the Install VS Code Espressif IDF Extension section.
Create ESP-IDF project in Eclipse
Now that the ESP-IDF has been installed and configured, we need to test the setup with the traditional Hello World application. In the embedded world this is traditionally a flashing LED program.
There should be a desktop icon to run ESP-IDF Eclipse, if it is not then press the Windows key search for ESP-IDF Eclipse and run the program.
The first window that opens will ask you to select a workspace. I prefer to keep everything in the same ESP32 directory that I created earlier.
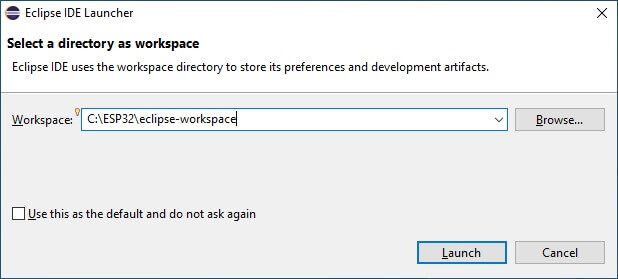
Click on launch and you will come to a welcome screen. You may explore the options on the welcome screen however for this Tutorial you are going to close the welcome screen.
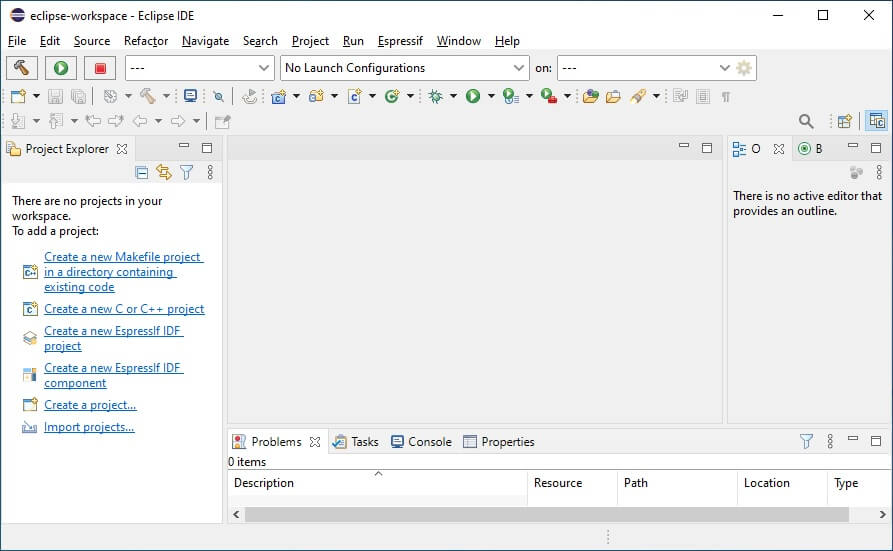
On the left-hand side should be the project explorer. Click on Create a new Espressif IDF Project. Alternatively go to File -> New -> Espressif IDF Project.
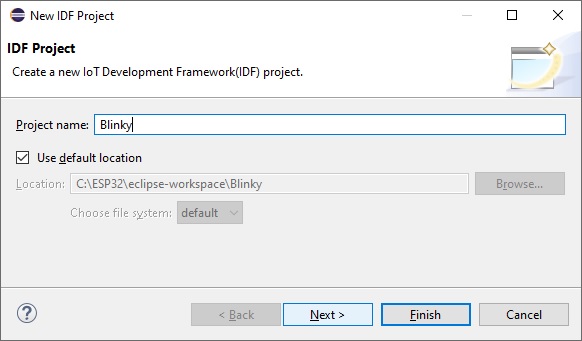
Enter a project name, for this example I’m going to name the project Blinky. After you have entered a project name click on next.
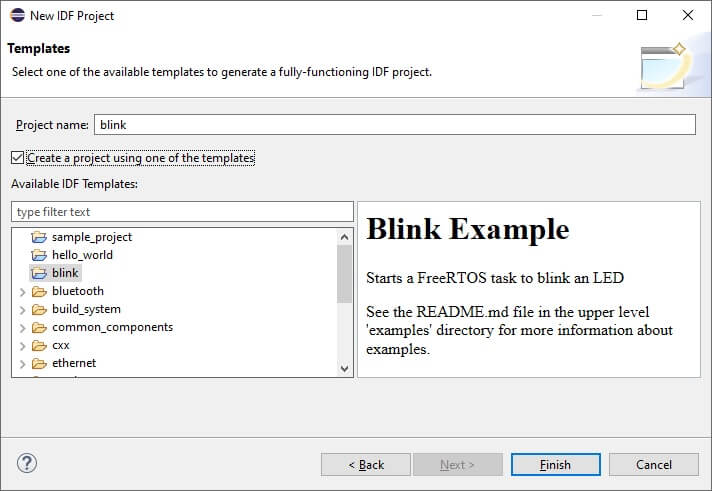
On the next window check the Create a project using one of the templates checkbox, select blink, and click on finish.
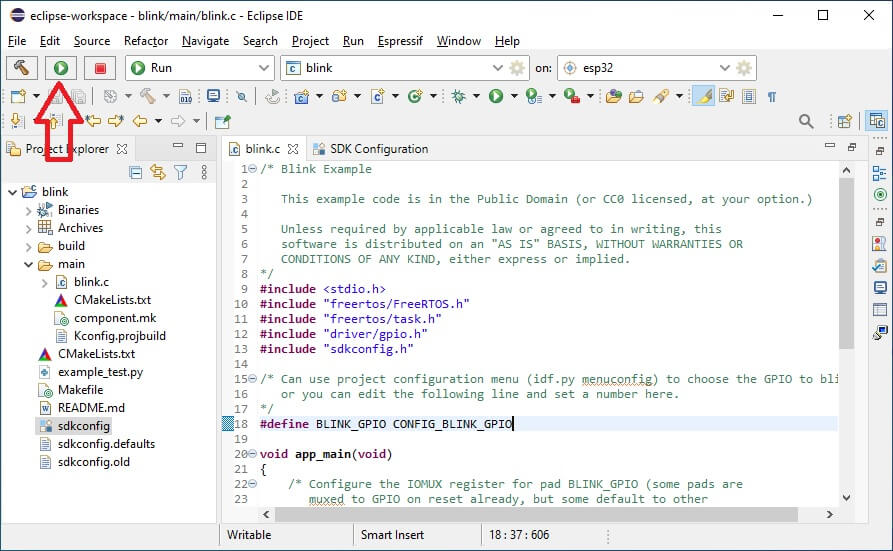
Your project is now created. There will however be numerous errors in the code and the configuration file has not been created yet. To resolve this you need to build the project by clicking on the icon that looks like a hammer on the upper left corner of the window.

Note that the initial build will take some time to complete. It will also take a fair amount of time to compile every time that the project configuration file, sdkconfig, is modified.
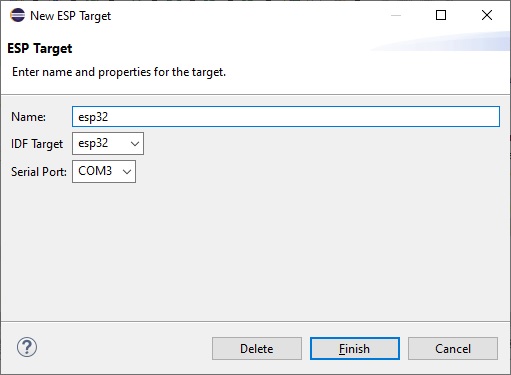
The next step is to select the device and serial port. On the top of the window, there will be 3 dropdown boxes with a gear next to the second and third. Click on the settings for the third dropdown box containing the text esp32.

In the window that comes up select the ESP device that you are using next to IDF Target and the Serial Port that your device is connected to. In the example below I am using an ESP32 device connected to COM3. Click on finish.
Now you only need to specify which pin to flash in the example. There are several ways to do this. The wrong way is to replace CONFIG_BLINK_GPIO with the pin number connected to a LED. The above method will work but will create what is called a magic number. A general rule of thumb in programming is to not use magic numbers.
The correct way to specify the LED pin is to open sdkconfig in the project explorer, select Example Configuration, and enter the pin number.
After you specify the pin connected to the LED you can press the run button on the top left-hand side of the window to flash the program to your ESP device.
Install VS Code
To install Visual Studio Code head to code.visualstudio.com, download and install the latest version of VS Code.
For some Linux distributions, extra care needs to be taken to download the official version of VS Code. A tutorial on that will soon be added.
Install VS Code Espressif IDF Extension
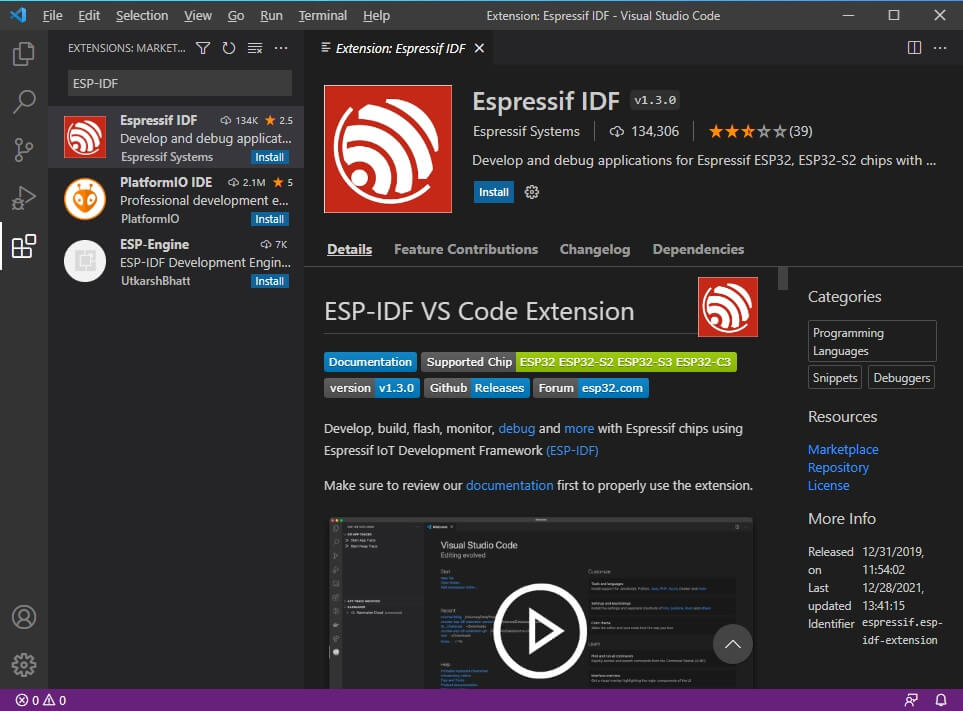
To install the Espressif IDF Extension in VS Code you need to open VS Code and navigate to the Extensions Tab. You can do this by clicking on the Extensions tab on the left-hand side or by pressing Ctrl+Shift+X.
In the search box type ESP-IDF. The first result should be Espressif IDF. Select that and click on install.
After the Extension has been installed you need to restart VS Code.
Once VS Code has restarted, open the command palette by navigating to View -> command palette… or by pressing Ctrl+Shift+P. In the command palette begin to type ESP-IDF: Configure ESP-IDF extension until in autocomplete enough to select Configure ESP-IDF extensions.

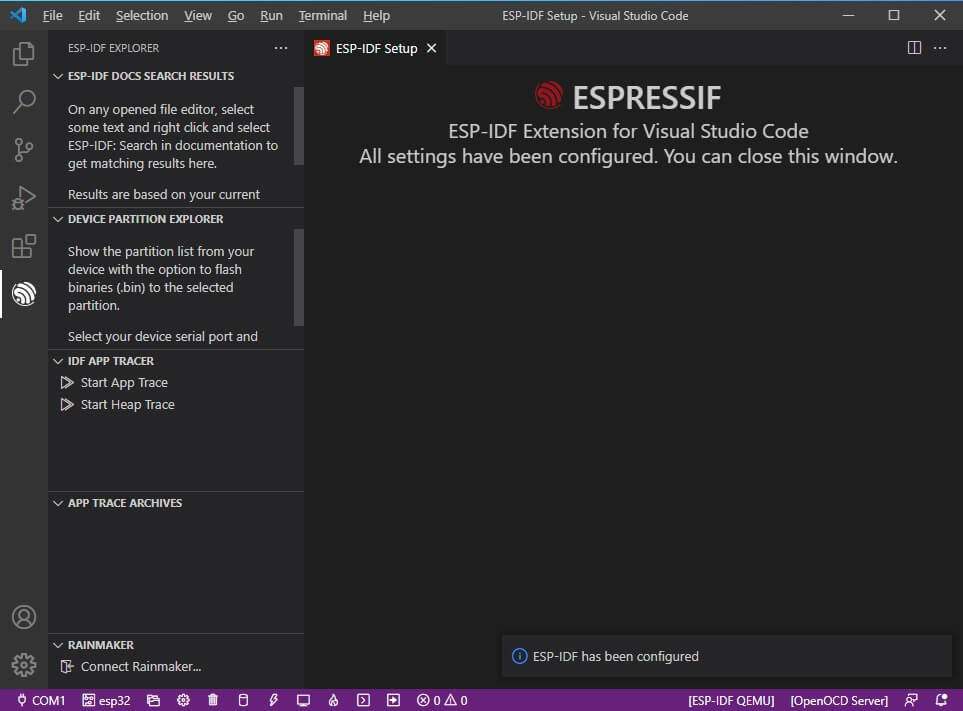
This will open up the ESP-IDF Setup window. If the ESP-IDF Tools are installed correctly the option to use the existing setup should be available.
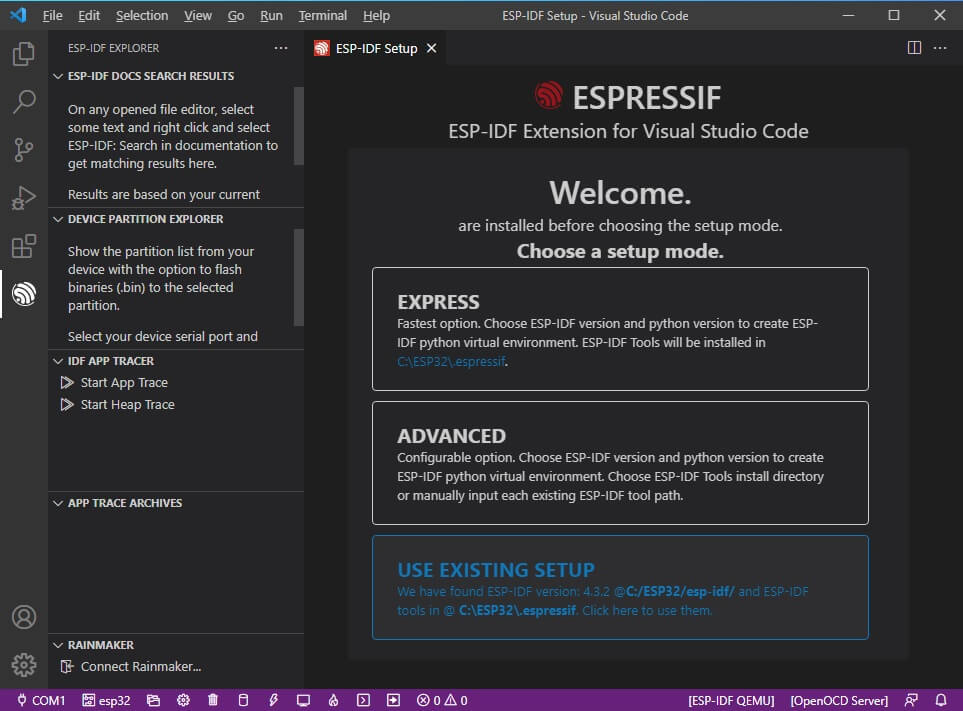
Click on USE EXISTING SETUP and let the setup complete. If the setup was successful you will be met with the following window and a message on the lower right-hand corner indicating that ESP-IDF has been configured correctly.
Create ESP-IDF Project is VS Code
Now that the ESP-IDF has been installed and configured, we need to test the setup with the traditional Hello World application. In the embedded world this is traditionally a flashing LED program.
To create a new project, open the command palette by pressing Ctrl+Shift+P and begin to type ESP-IDF: Show Example Projects until the autocomplete allow you to click on or select Show Example Projects.

When you select Show Example Projects, you will be asked to select which framework to use. If this is a new installation there will be only one option so go ahead on select that one.

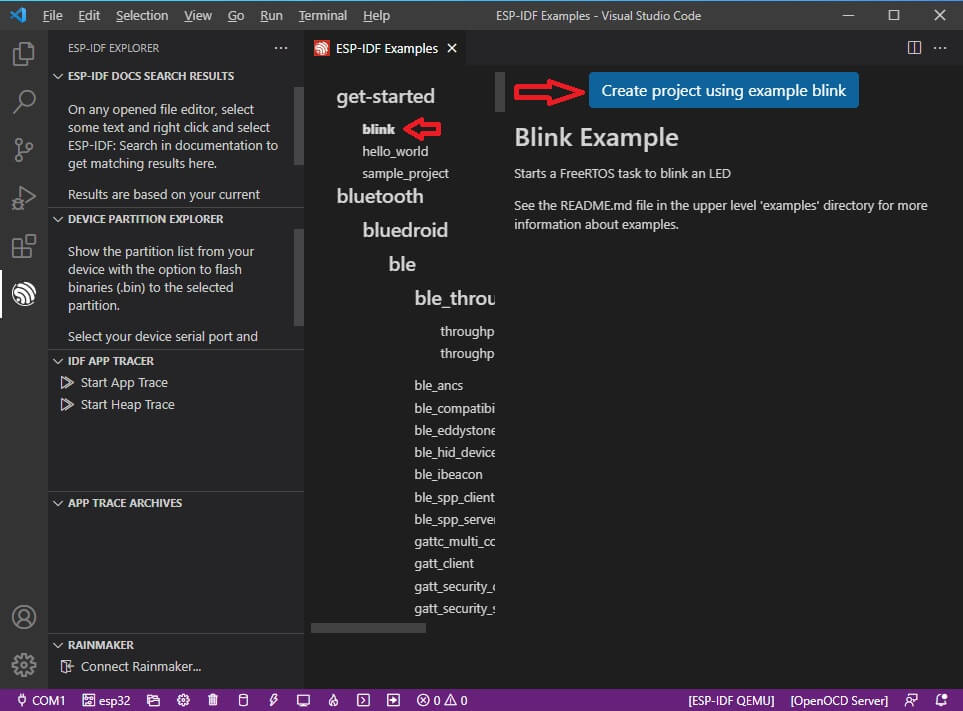
There is a rich library with a lot of useful examples to explore however for now we only want to test the setup. Select the blink example project from the get-started group and then click on Create project using example blink.
When you click on Create project using example blink, you will be asked to select a folder. This is the folder where the project will be housed. It is important that the path to any project location be less than 90 characters long and not contain any white spaces.
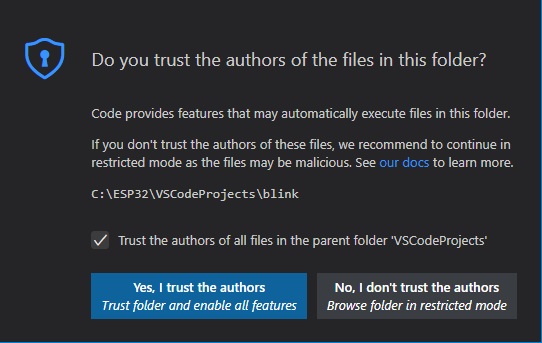
After you have selected a directory a popup window will appear asking for permission to execute files in the project directory. You need to grant permission to compile the project.
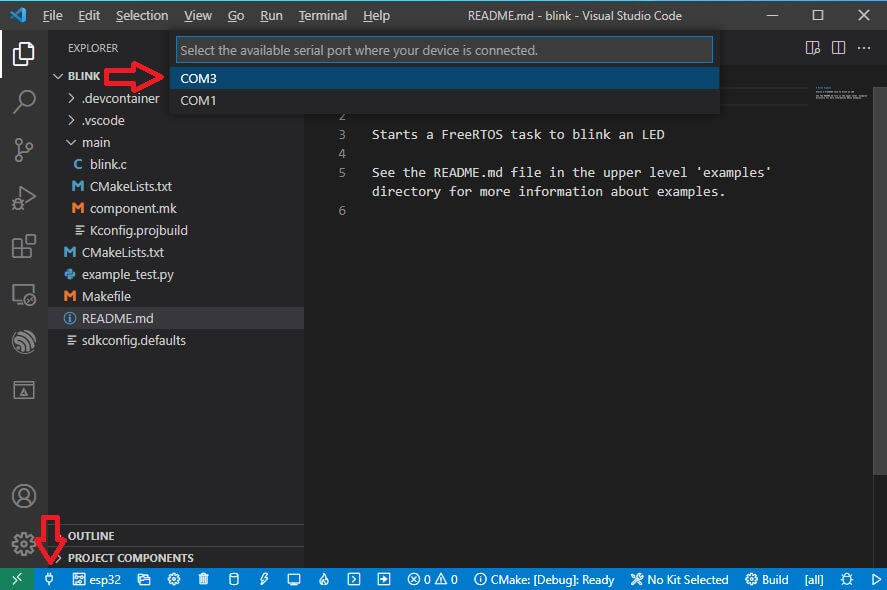
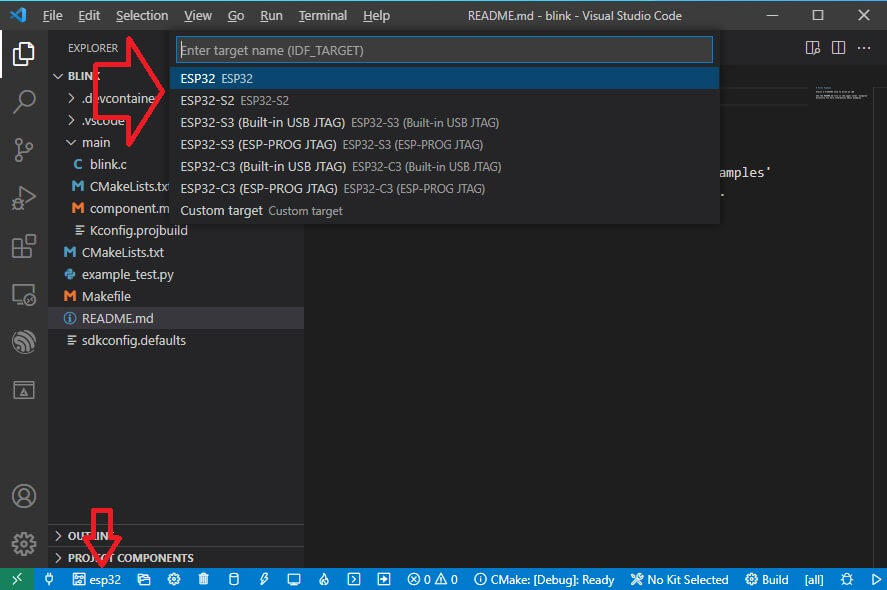
All of the controls for the ESP-IDF are located on the bottom left of the VS Code window. We will use a few of them to do the final configurations and to flash the blinking LED application onto the ESP32.
Next, we need to select the Serial port. To do this you need to connect your development board to your PC so that it can be detected. Then click on the icon that looks like a plug and select the COM port where the COM palette was found earlier.
Next, we need to select the ESP device that we are using. Doing this will also create the sdkconfig file. There are a few options, select the device that you are using. When you click on your device you will be asked where to save the configuration. This is where sdkconfig will be saved.
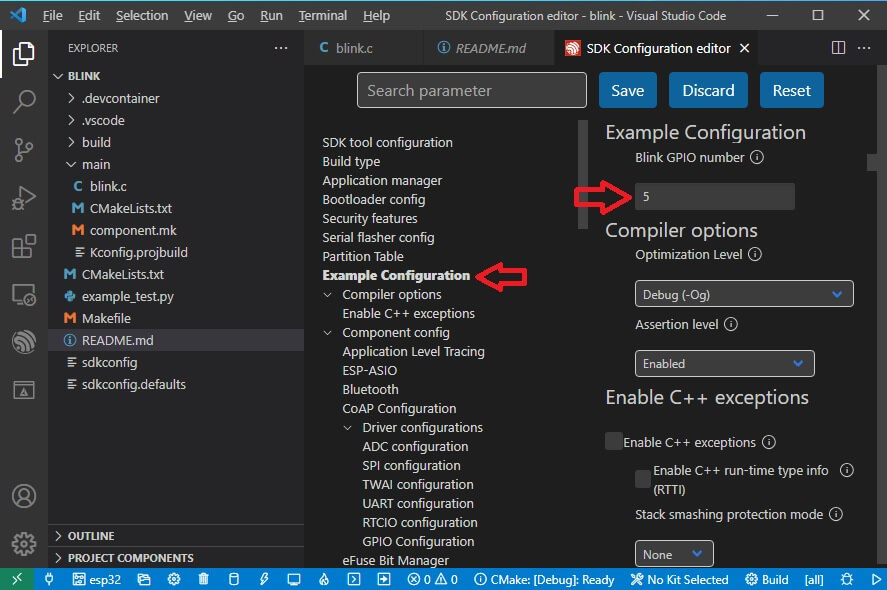
Now you can configure the project. Click on the gear to open the configuration utility.

Navigate to Example Configuration, enter the GPIO number where a LED is connected, and then click on save.
That is it! You can now build, flash and monitor the device. You can do all of those as individual actions, however for this tutorial you may click on the flame icon which will build the project then flash it to your device, and then open a serial monitor.

Final Thoughts
You learned how to set up the ESP-IDF in two different IDEs and created simple blinking LED projects in both to verify the setups. Which IDE to use is mostly up to personal taste, each has its strengths and weaknesses.
VS Code might be intimidating at first but grant a lot of possibilities with a wealth of plugins while Eclipse gives a more refined IDE experience but is not as flexible.
Thanks for reading.